Adding your school logo is one of the easiest ways to personalize a Canva template and make it feel official, polished, and ready to share.
Whether you are creating a PTO flyer, fundraiser sign, classroom newsletter, spirit week schedule, or school event invitation, uploading your school logo can help your design look more connected to your school community.
The good news? You do not need design experience to do it.
This step-by-step guide will show you how to upload a school logo in Canva and place it into your template without messing up the design.
Jump to a Section
Why Add a School Logo?
Before You Start
Step 1: Open Your Canva Template
Step 2: Click Uploads
Step 3: Upload Your School Logo
Step 4: Add the Logo to Your Design
Step 5: Resize the Logo
Step 6: Move the Logo Into Place
Step 7: Check the Logo Before Downloading
Helpful Tips
Common Logo Problems
Final Thoughts
Why Add a School Logo?
A school logo helps your flyer or printable feel more familiar and trustworthy.
It can make your design look like it belongs to your school, PTO, PTA, classroom, team, club, or event. This is especially helpful when you are sharing information with parents, teachers, students, or the wider school community.
Adding a logo can help your design:
- Look more official
- Match your school branding
- Feel personalized
- Stand out in emails, newsletters, and social media posts
- Build recognition for school events and fundraisers
Even a small logo can make a big difference.
Before You Start
Before uploading your logo to Canva, try to have the best version of the logo file ready.
The most common logo file types are:
- PNG
- JPG
- SVG
For most school flyers, a PNG file with a transparent background works best. This means the logo does not have a white box or colored rectangle behind it.
If your logo has a white background, that is okay too. You can still use it, but it may look best on a white area of the design.
Step 1: Open Your Canva Template
Start by opening your Canva template.
If you purchased a Planner Pat Printables template, open the PDF included with your download and click the Canva template link. This will open the design in Canva.
Once the template is open, click Use template for new design.
This creates your own copy, so you can edit it without changing the original.
Step 2: Click Uploads
On the left side of the Canva screen, look for the Uploads button.
Click Uploads.
This is where Canva stores images, logos, photos, and files that you add to your account.
On a computer, the Uploads button is usually on the left side menu. On a phone or tablet, you may need to tap the plus sign or menu options first.
Step 3: Upload Your School Logo
Inside the Uploads section, click:
Upload files
Then choose your school logo from your computer, phone, or device.
Once the file uploads, it will appear in your Canva Uploads area.
You only need to upload the logo once. After that, Canva will save it in your Uploads so you can use it again in future designs.
Helpful little win: future-you will appreciate not having to hunt for that logo again.
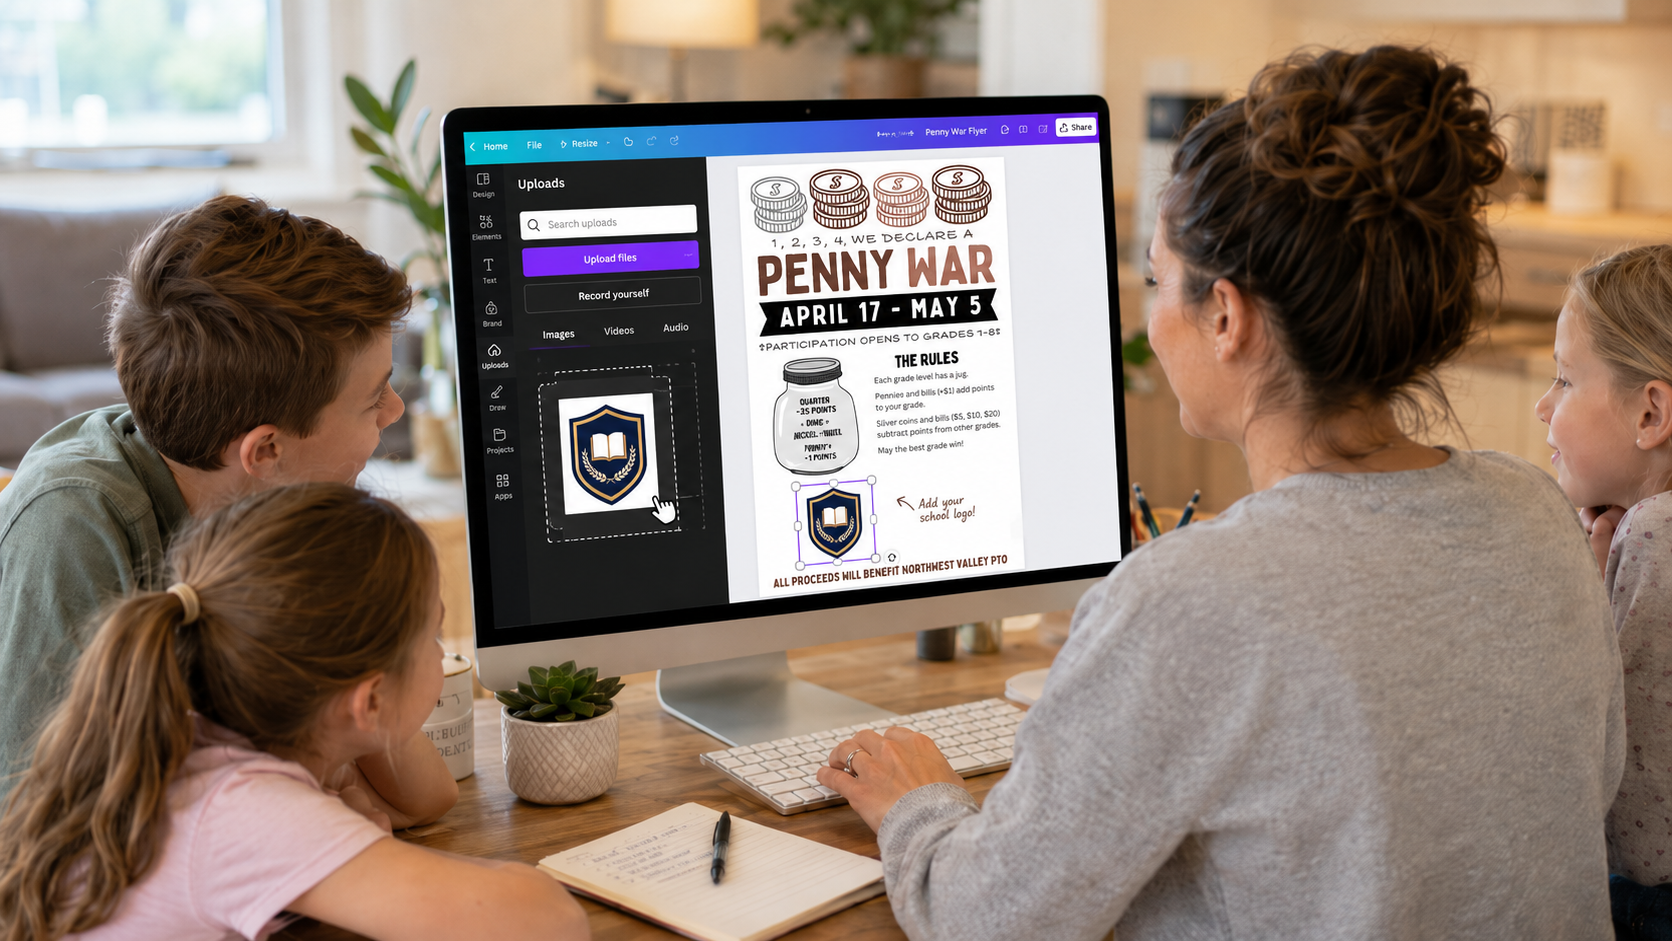
Step 4: Add the Logo to Your Design
After your logo has uploaded, click on it.
Canva will place the logo onto your design.
At first, it may appear too large, too small, or in the middle of the page. That is normal.
You can move it, resize it, and place it wherever you want.
Step 5: Resize the Logo
To resize the logo, click on the logo once.
You should see small circles or handles around the edges.
Click and drag a corner handle to make the logo larger or smaller.
Try to resize from the corner instead of the side. This helps keep the logo from stretching or looking distorted.
A good rule of thumb: your logo should be noticeable, but it should not take over the whole flyer.
Step 6: Move the Logo Into Place
Click and drag the logo to where you want it on the design.
Common logo placements include:
- Top corner
- Bottom corner
- Centered near the school name
- Near the event title
- In a footer area
- Inside a blank space or white box
Try to keep the logo away from important text. You want the design to feel balanced and easy to read.
If the template already has a sample logo or placeholder graphic, you can delete that first and replace it with your school logo.
Step 7: Check the Logo Before Downloading
Before downloading or printing your design, take a quick look at the logo.
Ask yourself:
- Is the logo clear?
- Is it easy to see?
- Is it too close to the edge?
- Is it covering any text?
- Does it look stretched?
- Does it match the rest of the flyer?
If something looks off, simply click the logo and adjust the size or placement.
A quick check now can save you from printing 50 flyers with a logo hiding in the corner like it is trying not to be noticed.
Helpful Tips
Use a Transparent PNG When Possible
A transparent PNG usually looks the cleanest because it does not have a background box around it.
This works especially well if your flyer has a colored background.
Keep the Logo Proportional
Always resize from the corner so the logo keeps its original shape.
If a logo looks too tall, too wide, or squished, undo the change and resize it again from the corner.
Do Not Place the Logo Too Close to the Edge
Leave a little space around the logo, especially if you are printing.
Printers can sometimes cut off edges, so keeping your logo slightly inside the design is safer.
Use the Same Logo Across Matching Designs
If you are creating a flyer, sign, newsletter, and social media graphic for the same event, use the same logo placement when possible.
This helps everything feel consistent and organized.
Common Logo Problems
The Logo Has a White Box Around It
This usually means the file is not transparent.
You can still use it, but it may look best on a white background or inside a white shape.
The Logo Looks Blurry
The file may be too small or low quality.
Try uploading a larger version of the logo if you have one.
The Logo Is Covering Text
Click the logo and move it to an empty space.
You can also make it smaller by dragging the corner handle.
The Logo Is Behind Something
Click the logo, then look for Canva’s position or layering options.
You may need to bring the logo forward so it appears on top of the background.
The Logo Is Too Bright or Distracting
Try making it smaller or placing it in a corner.
For most flyers, the logo should support the design, not compete with the main message.
Final Thoughts
Uploading a school logo in Canva is a simple way to make your template feel customized and ready for your school community.
Once your logo is uploaded, you can reuse it again and again for PTO flyers, PTA announcements, classroom events, fundraisers, newsletters, spirit weeks, teacher appreciation designs, and more.
Take your time placing it, keep it easy to read, and make sure it supports the design without taking over.
With just a few clicks, your Canva template can go from general to school-ready.